Showing posts with label Table Runner. Show all posts

Friday, February 1, 2013

And Just One More


Sprouts Table Runner and Topper pattern
[pattern is available here or here]

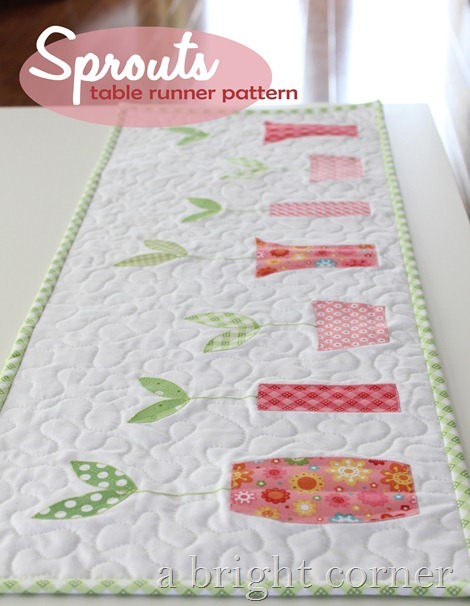
So here is the last version of the Sprouts Table Runner!  (Other two are here and here) 

This is the small size (12” x 30”) and is the perfect size to fit on a small rectangle table or on top of a bookcase or chest.  Yesterday a friend of mine commented that this one would also be a cute wall hanging!

Sprouts Table Runner and Topper pattern

For the applique stitching I did a zigzag around the vases and the leaves and used a tight zigzag for the stems like I did for the red circular version.  And as with the other two, I also added some lines through the leaves and vases – just some straight line stitching to give them some detail.

My favorite vase is the darker pink one on the far right:

Sprouts Table Runner and Topper pattern from A Bright Corner

These fabrics are all from Riley Blake – Hello Sunshine and Happy Ever After.

Sprouts Table Runner and Topper pattern from A Bright Corner

Have a great Friday everyone!

Linking up to Finish It Up Friday at Crazy Mom Quilts

Tuesday, January 29, 2013

Circle Time


A few weeks ago I was at my LQS and was talking to a woman about table runners.  She mentioned that she had a small, circular table and was always looking for table toppers that would fit.  Once she mentioned it I realized that I don’t see many around blog land.  I loved the idea of making a circle shaped table topper using the same vases and leaves from my rectangular runner idea. 

I played with different sizes of circles and different sizes of vases and ended up with this:
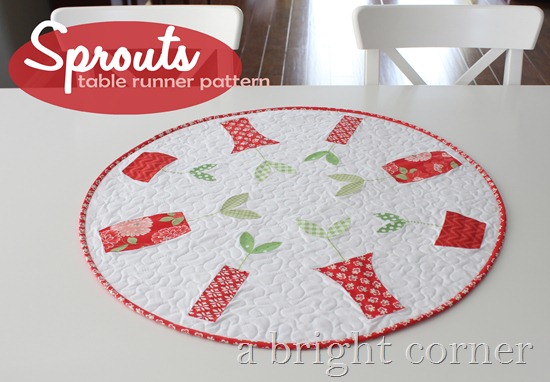
Sprouts Table Runner and Topper pattern
[pattern is available here and here]

It measures about 27” in diameter.  Even though it was intended for a round table, I think it still looks great on a rectangular one. 

For this red version I used several different applique stitching techniques, but they are all still done on a machine.  I first appliqued the vases, using one of the “blanket stitch” settings.  I added the detail lines to the pot using just a regular straight stitch, and just eyeballing where the lines should go. 

Cute applique vase and leaves

For the leaves I used a straight stitch, carefully stitching close to the edge of each leaf.  Then I went back and added the detail stitch down the center of each leaf.  The stems were created by first drawing in the stem with a light pencil line, then going over that with a tight zigzag stitch. 
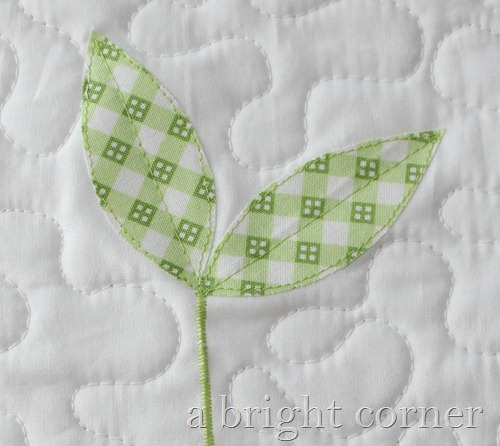
Cute applique leaves


When it came time to do the binding I was a little concerned about how it would turn out.  First of all, it requires bias binding.  Ok, no problem.  But I wanted to be able to do the binding completely on the machine – that’s where I was concerned. 

Sprouts table topper pattern


The bias binding sewed to the front of the topper just fine.  I folded it around to the back, used a generous amount of binding clips and began sewing.  It went beautifully!  As long as I took my time and didn’t try to rush too much (it’s hard to be patient when a project is SO close to completion!) then it went smoothly. 
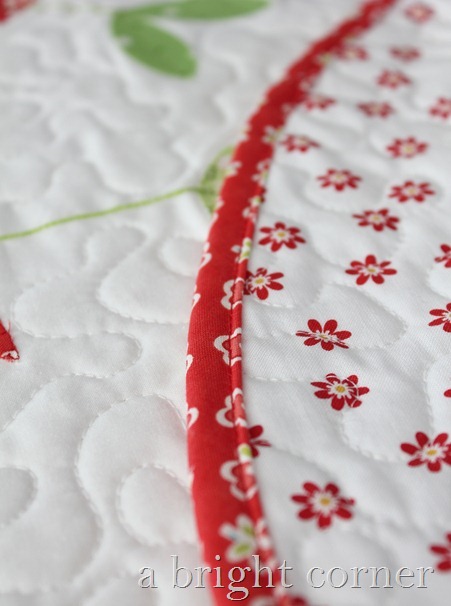
Sprouts table topper with red binding

It is interesting how the change in just the stitches can alter the feel of the finished topper.  If you haven’t seen it yet, you can take a look at a more artistic feel to the same project here.  Tomorrow I’ll show you the small pink version of this pattern which uses a different set of stitches. 

The Sprouts pattern is still on sale for 20% but just for a few more days!  Add the pattern to your cart here and then use the code “springsprouts” at checkout to receive the discount.  Offer good until Feb 1, 2013.

Sunday, January 27, 2013

A Taste of Spring


sprouts table runner and topper pattern

[pattern is available here and here]


Happy, happy sunshine!  Today our bad air blew on outa here and was replaced by blue sky, sunshine and (just a bit) warmer weather.  A welcome change! 

This past week, to fight off the winter blues I created a new table runner to go with my new table.  Our old table was a large square so all of my table toppers were large and uh, well, square.  I’m a little sad to not be able to use some of them any more on my table but a few of them were pretty worn and faded and needed to be retired.


Sprouts table runner

For my new runner idea I pulled out some Kona white and a stack of blue & green fabrics and sketched up some different vase shapes. 

This is one of my favorites:

Sprouts table runner (pattern)

All of the vases and leaves are appliqued on using Heat n’ Bond lite. Love that stuff.  Then I did some straight line stitching around all of the edges.  I used my free motion quilting foot and the same “scribbled” look that I used on my burlap Fallen Leaves table runner. 

For the stems I used a regular ol’ pencil to lightly draw a line and then I used my same free motion quilting foot and green thread to “draw” over the pencil line two or three times. As my youngest says, “easy peasy!”

Sprouts table runner (pattern)

Once I got that done, I thought the leaves and vases needed something else.  They seemed to be lacking a little detail.  So I added a line of stitching down each leaf, sometimes adding a little curve to the line to give the leaf some dimension. 

leaf applique on Sprouts table runner from A Bright Corner


I also added some detail lines to each of the pots.  I love what these extra lines add.

vase applique on Sprouts table runner from A Bright Corner

I had so much fun making this runner that I made two more – a red one and a pink one.  I’m not yet sure if I’ll be keeping both of those.  I also wrote a pattern for this project that includes instructions to make two sizes of runner as well as a circular table topper.  The pattern includes my step-by-step instructions, templates for the applique pieces (leaves and vases in two sizes) and diagrams for layout options. 

The pattern can be found here and here.  And to celebrate the departure of January 2013, get 20% off the pattern when you purchase from here and use the code “springsprouts”.  Coupon expires Feb 1, 2013. 

I’ll show you more of the pink and red versions tomorrow!  Oh, and the shop/blog I work for is having a giveaway this week for a $25 gift certificate.  Giveaways are always nice, aren’t they?

Thursday, November 15, 2012

Fallen Leaves Table Runner tutorial –more burlap!


I have another quick and easy burlap project for you – and this one is even easier than the last one! 
This is my “Fallen Leaves” table runner:

"Fallen Leaves" table runner tutorial

I began by cutting a 12” by 40” piece of burlap.  I chose 12” because that is slightly thinner than the width of my bookcase.  You can choose whatever size you want – a square one would be great! 
I also cut two 14” pieces of jumbo yellow ric rac.

Then I drew some simple leaf shapes onto a piece of paper.  I found that I liked the leaves that were 3.5”, 4” and 4.5” long.  I placed my Heat n’ Bond lite over my leaf drawing and traced several of each size onto the paper side of the fusible web.  

I ended up with 17 leaves total.

I cut out around each leaf (not right on the line, I left about 1/4”) and pressed each one onto a piece of fall colored fabric (I used the scraps from this Thanksgiving banner).  I then cut out each leaf (right on the drawn line) and removed the paper backing.

I spread out the burlap, placed the ric rac and scattered the leaves around until I liked the way it looked. 

 "Fallen Leaves" table runner tutorial

I pinned each one in place just to hold it there while I moved it all over to the ironing board.

applique leaves

Then I ironed all of the leaves in place.  This burlap had kind of an open weave and I was concerned about the adhesive from the leaves getting through to the ironing board, so I put a piece of paper beneath the burlap.  No problems whatsoever. 

applique leaves

Then came the fun part!  I used my free motion quilting foot and using a brown thread I quilted around each leaf 4 or 5 times.  I allowed the lines to be a little messy to give the “scribbled” look.  It was so much less stressful than trying to get a nice, exact line around each curved edge of all 17 leaves.  What a headache that would have been.  And it would have taken me twice as long.  This was FUN!


"Fallen Leaves" Table Runner tutorial


"Fallen Leaves" Table Runner tutorial

The last step was to stitch on the ric rac.  Here is the finished table runner- already at home on the top of my bookcase!

"Fallen Leaves" Table Runner tutorial

If you make one, I’d love to see it! 


Linking up to Confessions of a Fabric Addict and Finish it up Friday!


Related Posts Plugin for WordPress, Blogger...